September 23, 2022
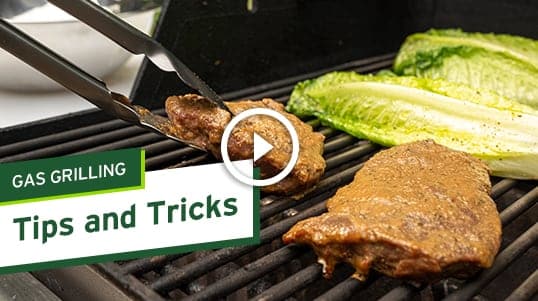
It’s hard to beat the convenience of a trusty gas grill. While every backyard cooking enthusiast has their preferred methods, the gas grill helps make serving juicy grass fed beef steaks and burgers a breeze. However, did you know that there’s more to gas grilling than just igniting and turning up the burners? We have some tips and tricks for ensuring the perfect grass fed beef each time you use your gas grill!
How to Cook Grass Fed Beef on a Gas Grill
Step 1: Choose Your Grass Fed Steak (and Sides)
Before you start heating up the gas grill, you’ll need to pick the central point of your meal: the beef! Any Grass Run Farms 100% Grass Fed Steak can be grilled to mouth-watering perfection on the gas grill. If you’re looking for a versatile and delicious option, we suggest the Grass Run Farms 100% Grass Fed and Finished Beef Tenderloin Steak. Tenderloin steaks come from the loin primal, which is located below the backbone. The loin primal produces some of the most popular cuts, known for their delicious tenderness. You can also enjoy a fantastic meal with a Grass Run Farms 100% Grass Fed and Finished New York Strip Steak or feed a crowd with Grass Run Farms 100% Grass Fed and Finished Ground Beef Patties.
Pro-tip: Cut down on the cooking appliances you’ll need to complete your meal by cooking a complete meal on the same grill.
Seasonal vegetables and fruits can be grilled alongside your grass fed beef. Heat helps enhance these items’ natural flavors and adds a delicious char that heightens taste and texture. Try romaine wedges drizzled with olive oil for an easy alternative to a fresh salad.
Step 2: Prepare Your Gas Grill
Similar to readying a charcoal grill, you’ll want to take a few minutes to prep your gas grill. You can utilize the burners of your gas grill to control temperature and create “zones” to get a chef-worthy sear and ensure your grass fed beef is cooked to the right internal temperature. Lighting half of the number of burners on your gas grill will produce an area for searing, while the unlit side provides an area for cooking the rest of the meat. Thicker cuts, like a grass fed New York Beef Strip Steak, benefit from this additional zone. Thinner cuts, like a grass fed Skirt Steak, are best on a higher heat for a shorter period.
It’s also important to remember that if you’re cooking on high heat, it’s ideal to not close the lid on the gas grill. Closing the lid traps in the heat the burners are producing and will raise the temperature, which could overcook your grass fed beef. When cooking certain cuts or searing, leave the lid open. Close the lid when you are allowing cuts to cook at lower temperatures or on the unlit side of the grill.
Pro-tip: If you’re looking for a great-tasting grass fed burger or steak that’s perfectly cooked each time, you need to keep up on your cleaning!
It’s easy to simply turn off the burners and allow the gas grill to cool and go about your evening. However, keeping grill grates clean is key to keeping your gas grill in tip-top shape. A clean grill heats up faster and more evenly and won’t impart unwanted flavors on your grass fed beef.
Step 3: Add Grass Fed Beef
Once your gas grill is prepped and heated, your grass fed beef is ready to go! Season your grass fed steak or burgers to your liking (or marinate your grass fed steak ahead of time for a pop of flavor). Place the steak on the heated side of the grill. Add any other additional items as needed. Allow the steak to cook undisturbed for at least five to seven minutes. Flip each steak and cook for an additional five to seven minutes, or until the grass fed steak has reached an internal temperature of 145oF.
Step 4: Check Your Zones
You won’t need to switch cooking zones for certain cuts, like a skirt steak or a ground beef patty, which cook quickly. For others, like a ribeye, you’ll want to move to the “cooking” zone after searing. Then, close the lid and allow the grass fed steaks to cook to the recommended internal temperature. Using a high quality meat thermometer is essential for achieving desired doneness! Once you’ve confirmed your grass fed steak’s internal temperature, remove from the grill, and allow to rest for three to five minutes. Wondering why it’s essential to rest your steaks after cooking? We explain this simple step with big rewards here.
Pro-tip: Check your side dishes!
If needed, move any vegetables or fruits to the “searing” zone to finish cooking while your grass fed beef is resting. It should all be cooked by the time your grass fed steaks are ready for cutting. Just remember to cut against the grain!
When you’re ready to shut down your gas grill for the day, leave the burners on and the lid open for another five minutes after all food has been removed. This step makes cleaning the grill grate easier (and crosses that task off your list right away). When using a traditional bristled grill brush, check to make sure all bristles are secure before scrubbing. If you’re looking for a grill brush and scraper that works on a variety of surfaces and is bristle-free, check out this option.
Once your gas grill is spic-and-span, shut off all burners and the fuel source. You can either close the lid or leave open; the gas grill will cool once all heat sources are removed. Just be sure to allow the gas grill to fully cool before using any sort of grill cover to protect against the elements.
If you’re looking for other cooking tips, check out our Cast Iron Skillet tips and our Charcoal Grilling tips <link forthcoming>. Visit our recipe library to inspire your next Grass Run Farms American 100% grass fed and finished beef meal and then purchase Grass Run Farms products online or at your local retailer.